- +86-138 4056 0445,+86-151 4027 2439
- info@careagemedical.com

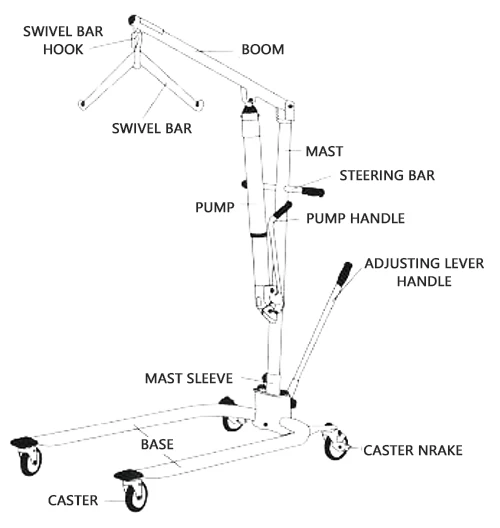
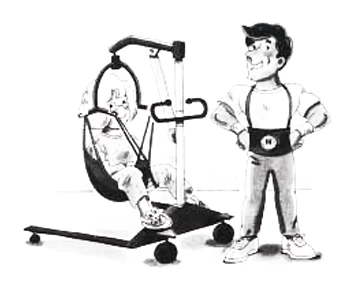
Product Name: Hydraulic Patient Lift Product Model Number: 71910 Width: 590 mm Push Handle Height: 1140 mm Weight Limited: 150 kg


Product Name: Electric Patient Lift Product Model Number: 71970 Width: 590 mm Push Handle Height: 1140 mm Weight Limited: 150 kg

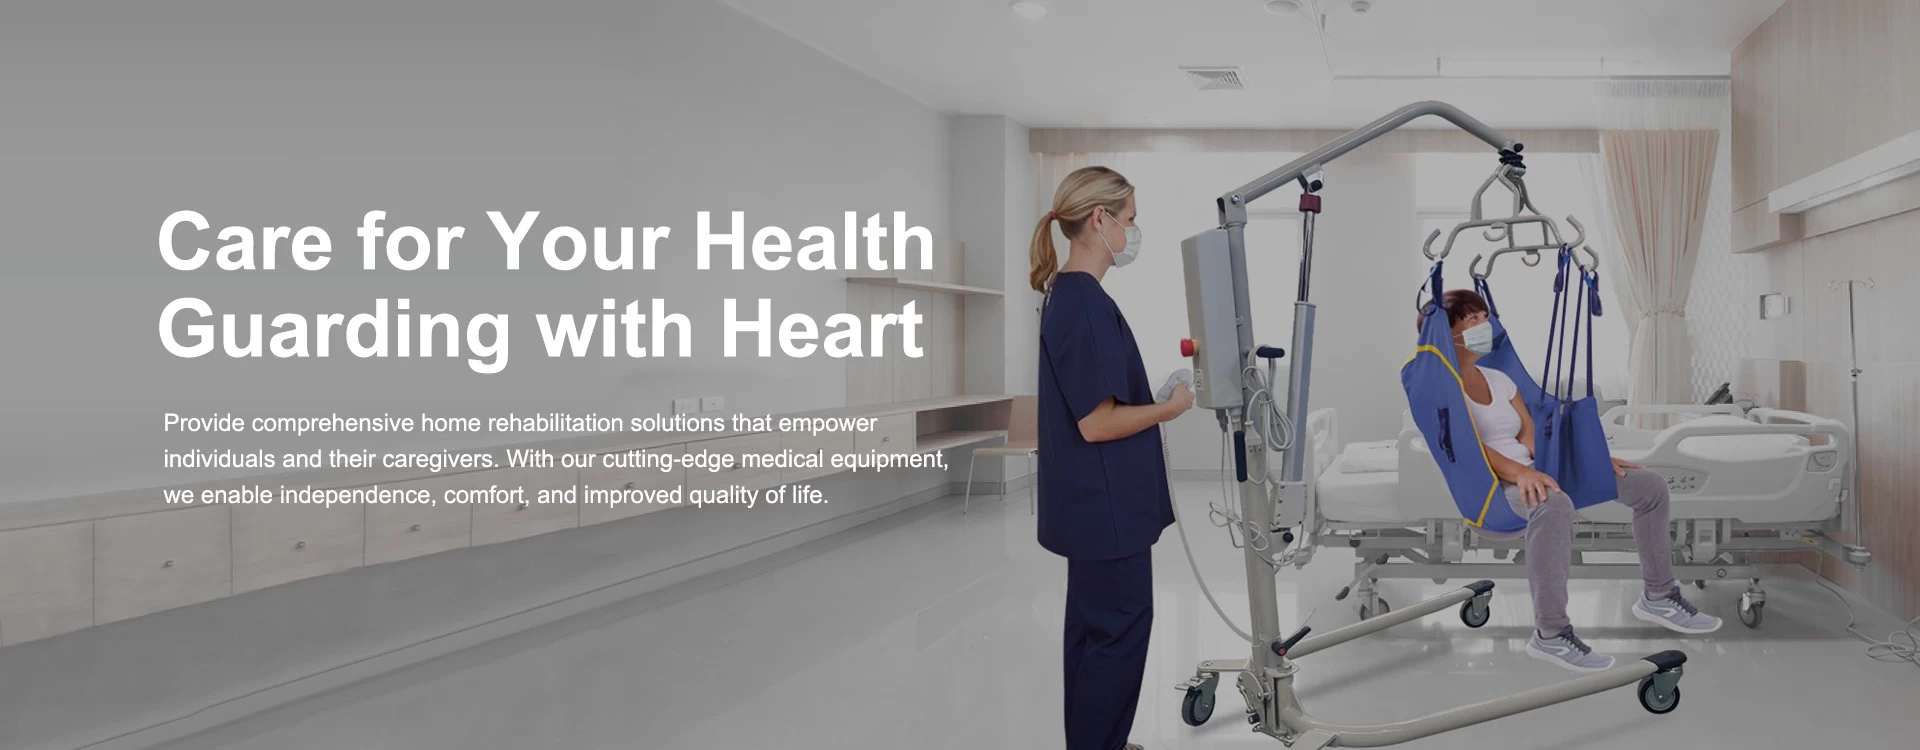
The electric patient lift which can easily move the patient up and down , saving effort and meeting the life needs of the patient. Transfers may be to and from beds, chairs, floor to bed, lateral transfers, bathing, and toileting , and offers a wide selection slings for a variety of lifting situations.


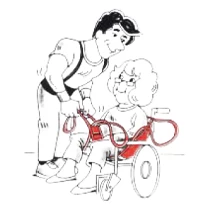
Knowledge of wheelchair selection and use Guided Reading In the process of treating patients, the wheelchair is a very widely used tool, such as lower limb disability, hemiplegia, paraplegia below the chest and mobility disabilities are ve


What is a Patient Hoist? What is a Ceiling Hoists? What is a Portable Overhead Hoists? What is a Mobile Hoists?

Product Description: The Shifting Machine (Medical Skyrail section) is mainly composed of an electric lifting shifting machine, a track, a sling, and a sling. The products can transport the patients in a safer and more comfortable way, eliminate th

Four Questions to Ask Before Buying a Patient Lift 1. Do you want a manual or electric lift? 2. How much weight will the lift need to support? 3. How high will you need the lift to lift your patient? 4. Will you be taking your lift anywhere? Four Types of Specialty Patient Lifts

Calculation of space distribution demand for the hospital medical beds Based on the types of rehabilitation diseases, the number of rehabilitation patients and the number of rehabilitation beds in the region are calculated by using the geographic infor
How to Lift Patients Properly Transfer patient device recommendation
How do you transfer and lift elderly adults Useful tips for transfer and lift elderly adults
if you run a business, hospital, clinic or need the devices for personal use, you can visit CareAge Medical site.
|
BASIC RECOMMENDATIONS
|
|
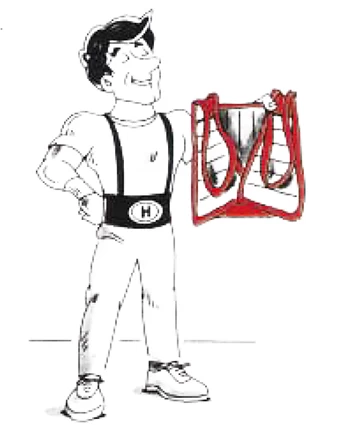
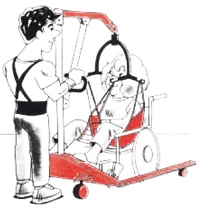
Hoyer lifters allow a person to be lifted and transferred with a minimum of physical effort. Before attempting to lift anyone, practice using the lifter. |
|
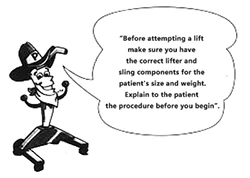
Take tums with fellow clinicians, practicing on each other. It is important that you know how a patient will feel in the lifter. When lifting a patient, be certain to explain the procedure to the patient being lifted. Reasons for using a lifter for transfers are:
|
 |
|
|
|
For assembly and maintenance, refer to the separate manual, “Assembly and Maintenance of Lifters". If you did not receive a copy or need additional copies contact :CareAge Medical at +86-024-23180188.
|
|
SAFETY PRECAUTIONS
|
|
|
|
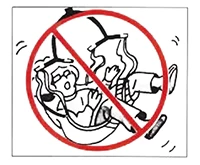
Lifters may tip over if used improperly!Failure to observe the following warnings may result in serious injury to patient and/or attendant.
|
|
READ INSTRUCTION BOOK CAREFULLY BEFORE ATTEMPTING TO LIFT ANYONE!
|
|
Never exceed the maximum capacity of the lifter. |
 |
 |
 |
 |
|
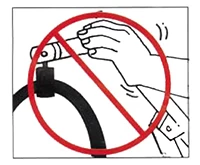
Never push or pull on lifter boom, Pushing or pulling on boom can cause lifter to tip over. |
The weight must be centered over the base. When lifting. Always keep patient centered over the base and facing the attendant who is operating the lifter. |
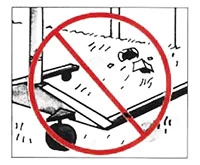
Do not lock the brakes or block the wheels when lifting patient. The wheels must be Free to roll to allow the lifter to center itself beneath patient. |
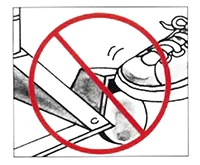
The lifter is not designed for use as an equipment hoist. Never use the lifter to lift or transfer anything other than a patient. |
 |
 |
 |
 |
|
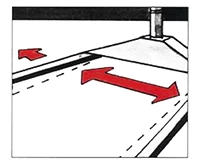
To reduce the hazard of tipping over, spread adjustable base lifter to their widest position before lifting anyone. |
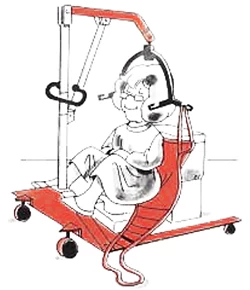
Patient(especially when wearing slippery garments) may slide out of sling if it is not adjusted properly. Position patient so that knees are slightly above waist. |
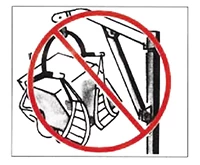
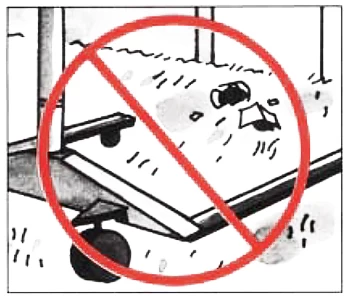
Do not move lifter and patient over shag or deep pile carpeting, thresholds, unpaved surfaces, outdoors or any other obstructions that can cause wheel stoppage and a tip over. |
Use restraint straps for comatose, spastic, agitated or severely handicapped patients, Use restraints only with physician is prescription. |
|
BASIC LIFTERS: PREPARATION AND OPERATION INSTRUCTIONS
|
|
The following instructions apply to all types of lifter. |
 |
|
|
 |
|
To raise lifter: Base of lifter must be spread to widest possible position. Push up button |
 |
|
To raise lifter: Base of lifter must be spread to widest possible position to maximize stability. Pump hydraulic handle. Steering handle may be held to steady lifter To lower lifter: Open hydraulic pressure release knob by turning it counter clockwise, not more than one full tum. Release knob is located on pump near pump handle. |
|
|
|
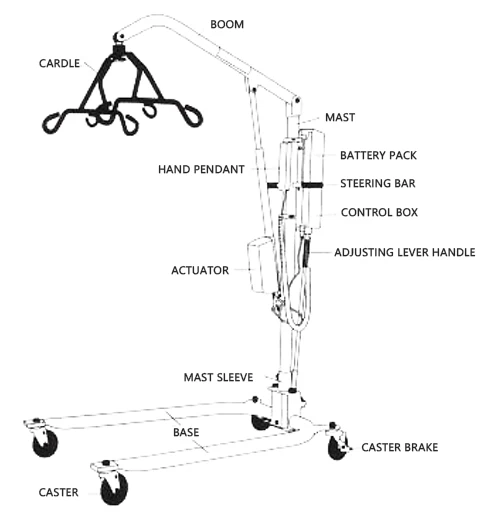
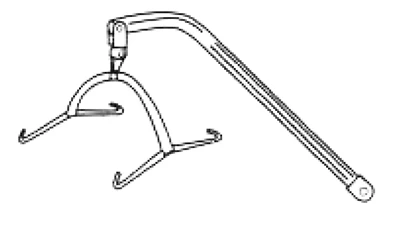
Retro-Fit Kit Boom and Cradle
|
 |
|
GENERAL USE INSTRUCTIONS
|
|
TRANSFER FROM BED |
|
For easier transfers follow these instructions。 |
|
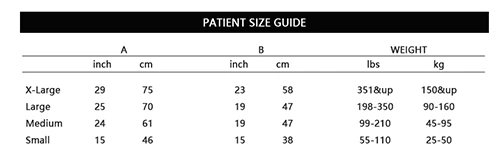
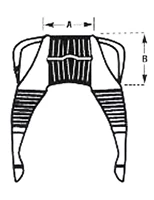
4-POINT SLING INFORMATION
|
  |
|
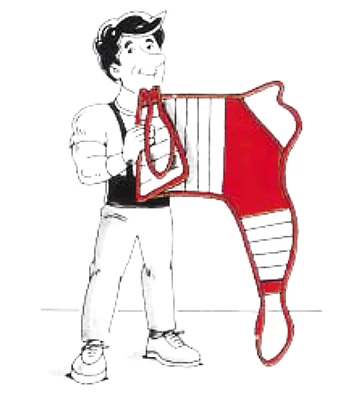
Padded U-Style Sling: |
|
Fold sling as shown
|
||
|
|
|
|
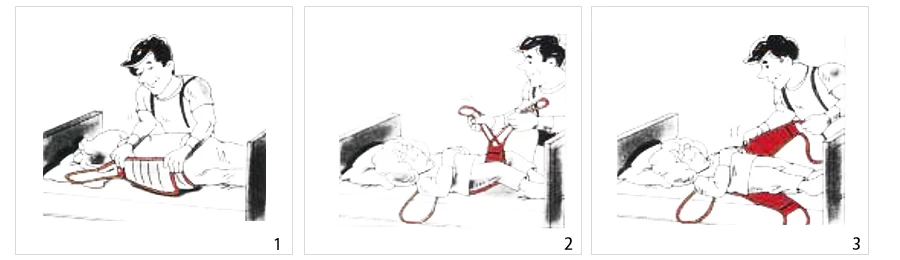
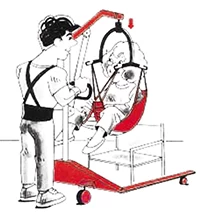
1.Put the folded sling behind patient's back Roll patent onto her back.
2.Pull the leg loops forward and under the thigh as shown.
3.Cross the loops .
|
|
|
|
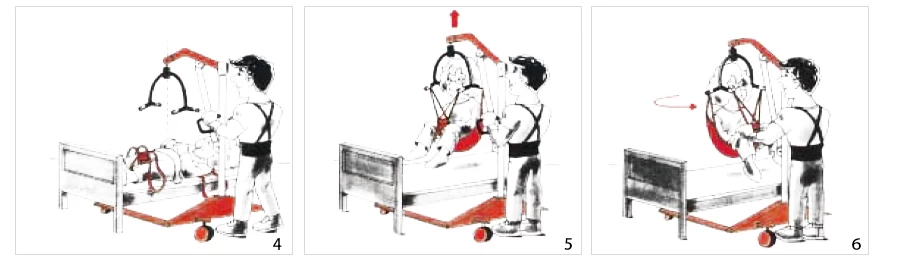
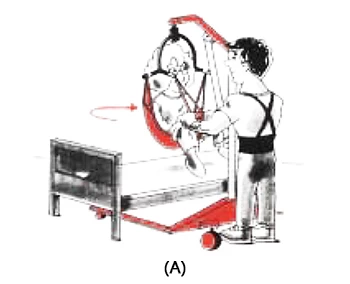
3. Roll the base as far under bed as possible locating the cradle over patient. Take care not to lower the frame onto the patient. Figure (4) |
|
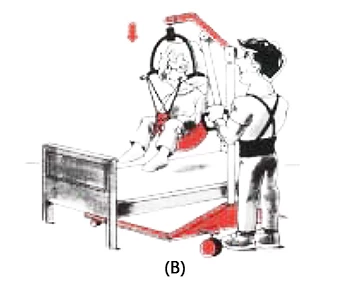
TRANSFER TO BED |
||
|
||
|
1. Raise lifter until patient's buttocks are above the surface of the bed. You may need to lower bed height. If patient cannot be lifted above bed, Do not push or pull patient onto bed. This can result in a tip over and serous injury to the patient and attendant. |
|
 |
 |
|
|
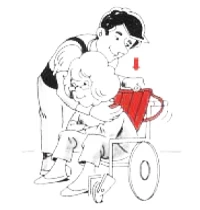
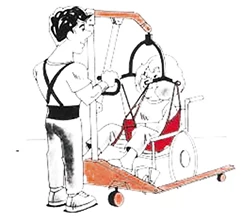
TRANSFER FROM WHEELCHAIR OR CHAIR
|
|||||||||
|
|
TRANSFER TO WHEELCHAIR OR CHAIR
|
|
1. Position lifter so that the patient is as far back in chair as possible. Always be sure to lock wheelchair brakes, if transferring to a wheelchair. |
|
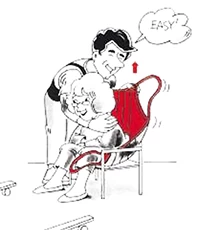
3. To position, push gently on the knees of the patient with your right or left hand while simultaneously lowering patient into chair. |
 |
|
REMOVING SLING FROM UNDER PATIENT |
|
Note: It is not necessary to remove sling unless desired by patient. |
 |
|
WHEELCHAIR TO CAR TRANSFER
|
|
Note: Use Hoyer lifters with 3-inch or 4-inch casters for low clearance cars. 1. Open car door completely. |
 |
|
CAR TO WHEELCHAIR TRANSFER |
|
1. Adjust seat and slings to proper point of adjustment and connect to cradle. |
 |
|
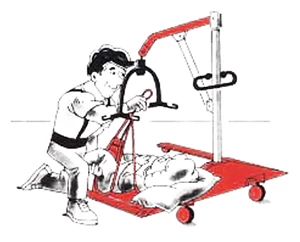
LIFTING PATIENT FROM FLOOR
|
|
1. Position lifter behind the patient with a pillow over the base to support patient's head and neck, Lifter should be positioned with the litter arm centered over patient.
2. Lower cradle so that chains or straps reach hooks of sling or cradle. 3. Raise patient's knees and attach sling. 4. Lift patient up above the floor. Turn patient to face attendant and place patient's feet on the base of the lifter straddling the mast for extra stability. |
 |
|
 |
|
BATHROOM ACCESS |
||
|